How to Receive Emails When SMTP Ports Are Blocked
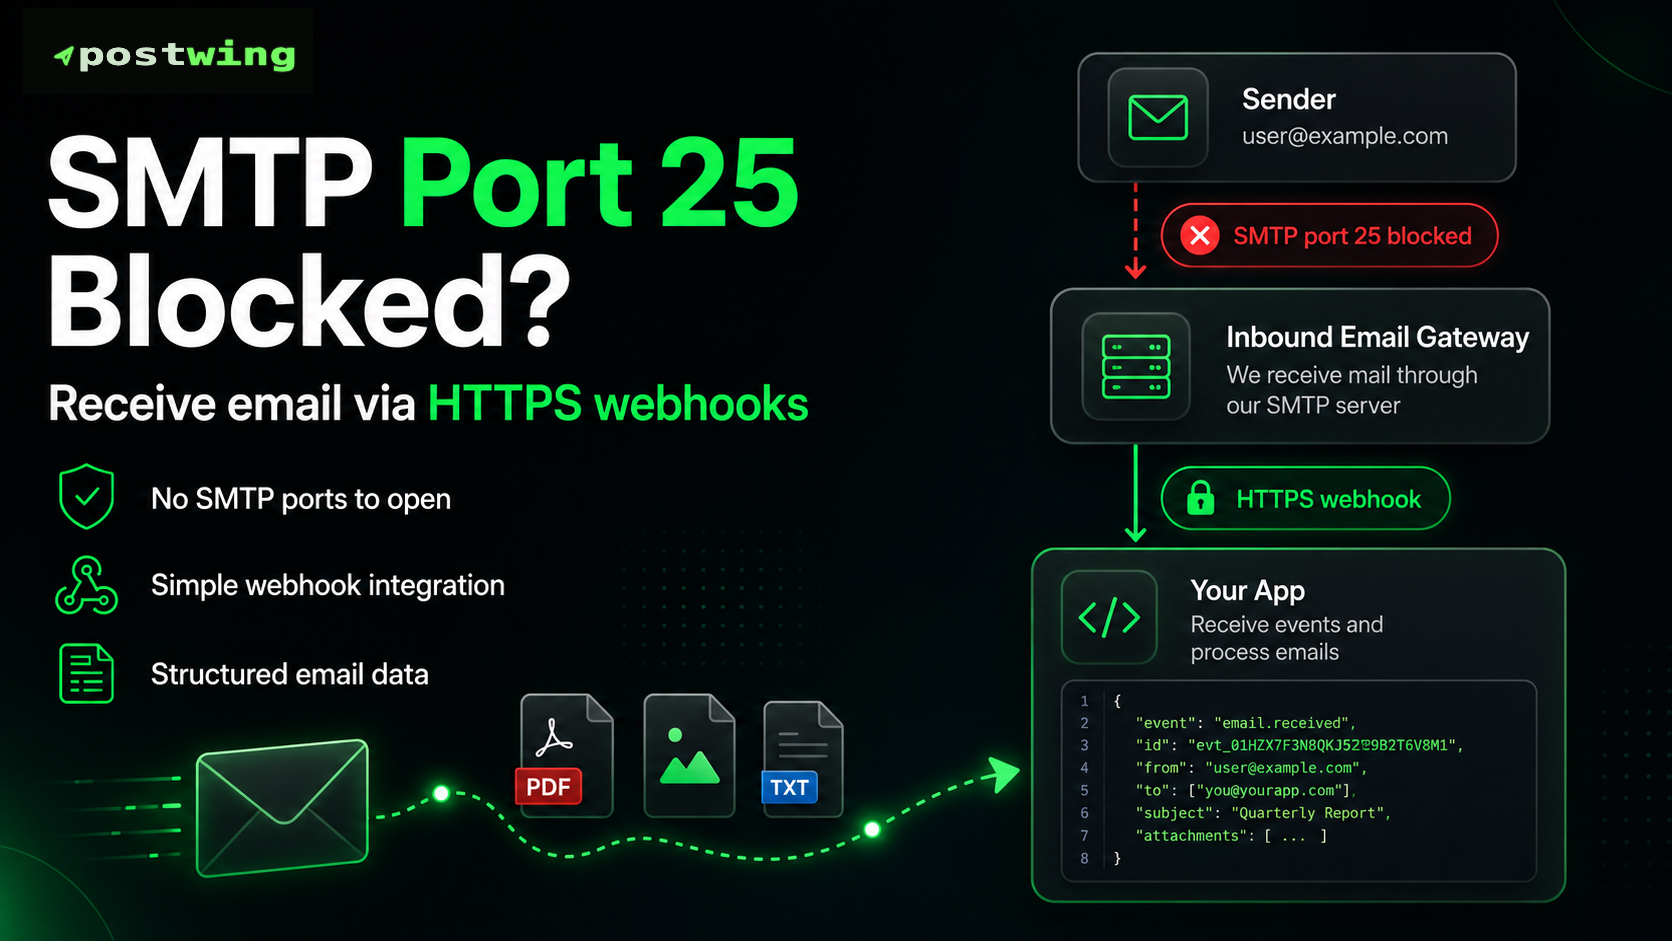
Your application needs to receive email.
Maybe you are building a support platform, processing invoices, tracking customer replies, or creating a unique email address for every project in your SaaS.
Normally, receiving email means running a mail transfer agent, exposing port 25, configuring MX records, handling MIME messages, validating senders, storing attachments, and monitoring the server.
That becomes a problem when your hosting provider blocks SMTP traffic—or when your engineering team simply does not want to operate an internet-facing mail server.
The practical alternative is to separate email transport from application processing:
- An inbound email provider accepts the SMTP connection.
- The provider parses and stores the message.
- Your application receives the email as a signed HTTPS webhook.
- Your code processes the message like any other API event.
Postwing’s inbound email feature implements this architecture. You point a receiving hostname at Postwing, create address routes, and receive parsed messages through inbound.received webhook events.
Why blocked SMTP ports cause problems
Before choosing a workaround, it is important to distinguish between the common SMTP ports.
| Port | Primary purpose | Does it receive public internet email? |
|---|---|---|
25 |
Server-to-server SMTP relay | Yes |
587 |
Authenticated message submission | No |
465 |
Message submission over implicit TLS | No |
Port 25 remains the standard port used when one mail server transfers a message to another. Port 587 is intended for message submission, while port 465 is registered for message submission over TLS. Replacing inbound port 25 with port 587 or 465 does not make your server a normal public MX receiver.
Cloud restrictions vary:
- Amazon EC2 restricts outbound port 25 traffic to public addresses by default.
- Google Cloud generally blocks external egress to port 25 but allows ports 465 and 587 unless your own firewall rules block them.
- Azure blocks outbound port 25 for many subscription and platform configurations and recommends authenticated relay services.
- DigitalOcean currently blocks SMTP ports 25, 465, and 587 on Droplets.
Many of these restrictions focus on outbound traffic. However, receiving email yourself still requires an internet-reachable SMTP service, correct firewall rules, a stable public IP, DNS configuration, TLS management, abuse controls, storage, and ongoing server maintenance.
For most SaaS products, removing SMTP from the application infrastructure is simpler than trying to negotiate port exemptions and operate a mail server.
The better architecture: MX in, HTTPS out
An inbound email service acts as a bridge between the email network and your application.
Sender's mail server
        |
        | SMTP on port 25
        v
Postwing inbound MX
        |
        | Parse, authenticate and store
        v
Signed HTTPS webhook
        |
        v
Your application
Your server only needs to accept normal HTTPS traffic. Postwing handles the SMTP-facing side of the system and delivers a structured JSON event to your webhook endpoint.
This means your application does not need to:
- Expose port 25
- Install Postfix, Exim, or another mail transfer agent
- Parse multipart MIME messages
- Maintain an SMTP queue
- Store raw messages and attachments itself
- Implement SMTP-level address rejection
- Keep a mail server IP off blocklists
You work with HTTP requests instead of SMTP sessions.
How Postwing inbound email works
Postwing inbound email is designed for application workflows rather than human mailboxes.
It does not provide IMAP or POP3 access. Instead, every accepted email is parsed and sent to your code as an inbound.received webhook. The event includes:
- the inbound message ID and the receiving domain
- the matched route and the accepted recipient
- the SMTP sender (
mail_from) and the parsedFromheader - the
ToandCcheader addresses - the subject, text body, and HTML body
- selected headers (
Date,Reply-To,In-Reply-To,References,Auto-Submitted,List-Id, and others) - DKIM authentication results
- the message size
- attachment metadata
- API links for downloading each attachment and the raw
.emlfile
Inbound email is a paid-plan feature: the domain’s plan must have both webhooks and inbound routes enabled. Paid plans allow up to 25 routes per domain by default.
Here is the setup process.
Step 1: Choose a receiving hostname
Start with a subdomain such as:
inbound.example.com
A subdomain is usually the better choice than the root domain.
For example, suppose your company already receives employee email at:
alex@example.com
support@example.com
Changing the MX records for example.com could interfere with that existing email service. A dedicated subdomain isolates application email:
ticket-123@inbound.example.com
reply-456@inbound.example.com
upload@inbound.example.com
The receiving hostname can be a subdomain of your verified domain, or the verified domain itself. If the domain was connected specifically for receiving—help.example.com, for instance—you do not need to add a second label.
There is one guard: if another provider’s MX record is already published on the domain itself, Postwing refuses it as a receiving hostname and suggests a subdomain instead. That prevents accidentally taking over mail that already flows.
Step 2: Publish the MX record
Postwing displays the exact DNS record required for your receiving hostname. A typical record looks like this:
inbound.example.com. IN MX 10 mx.postwing.app.
This record tells sending mail servers to deliver messages for @inbound.example.com to Postwing.
Three conditions turn receiving on:
- The domain is verified through the normal DNS record check (DKIM above all).
- The MX record for the receiving hostname is published and confirmed by Postwing’s DNS check.
- The domain’s plan includes inbound email.
Verification runs automatically. Once the record is confirmed, acceptance begins within a few minutes.
Postwing recommends making its MX record the only MX record for the receiving hostname.
You do not need to point your main domain’s mail traffic at Postwing.
Step 3: Create a webhook endpoint
Create an HTTPS endpoint in your application, for example:
POST /webhooks/postwing/inbound
Then add the endpoint in the Postwing dashboard and explicitly subscribe it to:
inbound.received
Inbound events are opt-in. Creating a general webhook endpoint without selecting inbound.received will not deliver incoming messages to it—and unlike sending events, an inbound message is not fanned out to every subscribed endpoint. It goes to the single endpoint named by the route that matched (see the next step).
Postwing signs webhook requests using HMAC-SHA256. Your application should verify the signature over the original request body before parsing or processing the event.
Every request carries these headers:
X-Webhook-Event      inbound.received
X-Webhook-Delivery   delivery identifier, the same value as event_id in the body
X-Webhook-Timestamp  signing time, unix seconds
X-Webhook-Signature  HMAC-SHA256, hex encoded
Step 4: Define inbound routes
Routes determine which addresses Postwing accepts and where their messages are delivered.
Postwing supports three useful route patterns:
| Pattern | Type | Example matches |
|---|---|---|
support |
Exact | support@inbound.example.com |
ticket-* |
Prefix | ticket-91@inbound.example.com |
* |
Catch-all | Any address not matched by another route |
Pattern rules:
- A pattern is the local part only—no
@, no hostname. - At most one
*, and only at the end. - A prefix route requires at least one character where the star is:
ticket-*matchesticket-91but notticket-. - Matching is case-insensitive.
- Each route points at exactly one webhook endpoint belonging to the same domain.
Exact routes have priority, followed by the longest matching prefix and then the catch-all route.
An email sent to an address that does not match an enabled route is rejected inside the same SMTP transaction: mail for a hostname Postwing does not receive on is refused at RCPT TO, and a known hostname with no matching route is refused with 550 after the message data. Either way the sending server generates the bounce, and nothing reaches your application. Postwing does not silently accept mail for undefined addresses.
This lets you create controlled address namespaces such as:
support@inbound.example.com
invoice@inbound.example.com
ticket-<ticket-id>@inbound.example.com
project-<project-id>@inbound.example.com
customer-<customer-id>@inbound.example.com
Step 5: Process the inbound webhook
A simplified inbound event contains fields such as:
{
  "event_id": "6f1d2c30-0004-4c7a-9b21-0c8e5a3d7f44",
  "event": "inbound.received",
  "inbound_id": "0f0b6c1a-4a1e-4a3a-9f7a-2c9d1b5e8a10",
  "domain": "example.com",
  "route": "support",
  "recipient": "support@inbound.example.com",
  "mail_from": "alex@customer.example",
  "from": {
    "email": "alex@customer.example",
    "name": "Alex"
  },
  "to": ["support@inbound.example.com"],
  "cc": [],
  "subject": "Problem importing my data",
  "text": "The import stops at 72%.",
  "html": "<p>The import stops at 72%.</p>",
  "headers": {
    "Date": "Tue, 12 Aug 2025 10:04:11 +0300",
    "Reply-To": "alex@customer.example"
  },
  "message_id": "<a1b2c3@customer.example>",
  "auth": {
    "dkim": "pass",
    "dkim_aligned": true
  },
  "size": 18422,
  "raw_url": "https://api.postwing.app/api/inbound/messages/0f0b6c1a-.../raw/",
  "attachments": [],
  "timestamp": "2025-08-12T07:04:12.481Z"
}
raw_url and each attachments[].url are stable Postwing API paths, not pre-signed storage links. That is deliberate: the event body is stored and replayed by retries for up to 24 hours, while a signed storage URL expires in minutes. You call the API path with your account credentials, and it redirects to a freshly signed, short-lived download URL.
Node.js webhook example
The following Express endpoint verifies the Postwing signature and accepts inbound events:
const crypto = require("crypto");
const express = require("express");

const app = express();

const webhookSecret = process.env.POSTWING_WEBHOOK_SECRET;
const replayToleranceSeconds = 300;

app.post(
  "/webhooks/postwing/inbound",
  express.raw({ type: "application/json" }),
  async (req, res) => {
    const signature = req.get("X-Webhook-Signature");
    const timestamp = req.get("X-Webhook-Timestamp");

    if (
      !signature ||
      !timestamp ||
      !/^[a-f0-9]{64}$/i.test(signature)
    ) {
      return res.sendStatus(400);
    }

    const timestampNumber = Number(timestamp);

    if (
      !Number.isFinite(timestampNumber) ||
      Math.abs(Date.now() / 1000 - timestampNumber) >
        replayToleranceSeconds
    ) {
      return res.sendStatus(400);
    }

    // The signature covers:
    // <timestamp>.<exact raw request body>
    const signedPayload = Buffer.concat([
      Buffer.from(`${timestamp}.`, "utf8"),
      req.body
    ]);

    const expectedSignature = crypto
      .createHmac("sha256", webhookSecret)
      .update(signedPayload)
      .digest();

    const providedSignature = Buffer.from(signature, "hex");

    if (
      providedSignature.length !== expectedSignature.length ||
      !crypto.timingSafeEqual(
        providedSignature,
        expectedSignature
      )
    ) {
      return res.sendStatus(400);
    }

    let event;

    try {
      event = JSON.parse(req.body.toString("utf8"));
    } catch {
      return res.sendStatus(400);
    }

    if (event.event !== "inbound.received") {
      return res.sendStatus(204);
    }

    // Queue this operation idempotently.
    // event.event_id remains the same across webhook retries.
    await enqueueInboundEmail({
      idempotencyKey: event.event_id,
      route: event.route,
      recipient: event.recipient,
      sender: event.from?.email,
      subject: event.subject,
      text: event.text,
      html: event.html,
      attachments: event.attachments,
      senderAuthenticated:
        event.auth?.dkim === "pass" &&
        event.auth?.dkim_aligned === true
    });

    return res.sendStatus(202);
  }
);

app.listen(3000);
Always calculate the signature from the exact raw request bytes. Parsing the body and serializing it again can change whitespace or formatting and invalidate the signature.
Postwing expects a 2xx response for successful delivery, and allows 10 seconds for it. Webhook handlers should verify and enqueue the event quickly rather than performing slow attachment processing or AI analysis before responding.
Failed deliveries are retried on a fixed backoff: after 1 minute, 5 minutes, 30 minutes, 2 hours, 6 hours, and 24 hours. Once those attempts are exhausted the delivery is marked failed, but the message itself remains available through the API and the dashboard.
Inbound limits
Defaults, per message and per domain:
| Limit | Value |
|---|---|
| Maximum message size | 30 MB |
| Attachments per message | up to 25 |
| Size per attachment | up to 25 MB |
| Stored text and HTML bodies | up to 500,000 chars |
| Throughput per domain | 500 messages/hour |
An oversized message is refused at the SMTP layer. When the hourly limit is exceeded, Postwing answers 450 and the sending server retries later. Bodies longer than the stored limit are truncated in the payload; the verbatim .eml always keeps the whole message.
Received messages and their stored files are deleted according to your plan’s log retention period.
What can you build with inbound email?
Receiving email as structured data supports considerably more than a contact form.
1. Email-to-ticket support system
Create an exact route:
support@inbound.example.com
When a customer sends an email:
- Postwing accepts and parses it.
- Your webhook receives the message.
- Your application looks up the customer by sender address.
- A support ticket is created.
- Attachments are associated with the ticket.
- Your application sends a confirmation through the normal Postwing sending API.
This gives customers a familiar support channel while keeping the workflow inside your SaaS.
2. Reply-to-ticket addresses
Assign each ticket a unique address:
ticket-8942@inbound.example.com
Create a prefix route for:
ticket-*
Your webhook can extract 8942 from the recipient and attach the message to the correct ticket.
This eliminates fragile subject-line matching. The routing identifier is part of the delivery address itself.
The same pattern works for:
thread-<id>@inbound.example.com
conversation-<id>@inbound.example.com
case-<id>@inbound.example.com
3. Reply-by-email notifications
Suppose your project-management SaaS sends this notification:
Maria mentioned you in Project Apollo.
Reply to this email to add a comment.
Set the message’s reply address to:
project-41-thread-987@inbound.example.com
When the user replies, your webhook identifies the project and thread from the recipient address. The email body becomes a new comment.
Before saving the comment, your application can:
- Remove quoted reply history
- Remove signatures
- Check whether the sender belongs to the project
- Detect automated replies
- Preserve attached files
- Store the original
.emlfor auditing
4. Invoice and document intake
Create an address such as:
invoices@inbound.example.com
Customers or suppliers can email invoices directly to your system.
Your application can then:
- Confirm that the message contains an attachment.
- Download the attachment through the authenticated Postwing API path.
- Scan the file for malware.
- Extract invoice fields.
- Match the sender to a supplier.
- Create an approval workflow.
- Store the raw email as an audit record.
Postwing’s inbound payload identifies each attachment’s ID, filename, MIME type, size, inline status, content ID, and API download path.
5. Per-customer ingestion addresses
Generate a unique address for every customer:
customer-a83f9@inbound.example.com
That address can become a simple integration surface. Instead of building an API integration, the customer forwards reports, alerts, receipts, or exported files to their assigned email address.
Your application knows which tenant owns the message from the recipient identifier.
This is useful for:
- Expense-management platforms
- Bookkeeping applications
- Compliance archives
- Logistics systems
- Property-management software
- Recruitment platforms
- Document-processing products
Use opaque, non-sequential identifiers when addresses expose tenant or object IDs.
6. CRM lead capture
Assign an email address to each campaign, partner, or sales representative:
partner-acme@inbound.example.com
campaign-berlin@inbound.example.com
rep-42@inbound.example.com
Incoming messages can automatically create leads and associate them with the correct acquisition source.
A catch-all route can support dynamically generated addresses, while exact routes can reserve sensitive or operational names.
7. Automated report processing
Many legacy systems can send email but cannot call a modern REST API.
Instead of building a custom integration, give the system an inbound address:
reports-warehouse-7@inbound.example.com
The legacy service sends its scheduled report by email. Your webhook receives the message, downloads the file, validates it, and imports the data.
Email becomes an adapter between an older system and your application.
8. AI-assisted email workflows
Because inbound messages arrive as structured JSON, you can pass selected content into an automated classification or extraction pipeline.
Examples include:
- Classifying support requests
- Extracting purchase-order numbers
- Detecting customer intent
- Summarizing long correspondence
- Routing messages to the correct team
- Drafting suggested replies
- Identifying missing invoice fields
Keep the webhook handler fast. Queue the message first and run expensive processing in a worker.
Treat email bodies and attachments as untrusted input. They may contain prompt-injection attempts, malicious documents, tracking content, or misleading instructions.
Security and reliability checklist
Moving SMTP outside your infrastructure reduces operational work, but your application still needs a secure webhook implementation.
Verify every webhook signature
Do not trust a request simply because it reached an obscure endpoint.
Validate:
X-Webhook-SignatureX-Webhook-Timestamp- The exact raw body
- A reasonable replay-protection window
Use a constant-time comparison for the computed and supplied signatures.
Deduplicate with event_id
Inbound delivery is at least once. A webhook may be retried when your endpoint times out or returns an error.
Store event_id as an idempotency key so the same event cannot create multiple tickets, comments, invoices, or leads. The value does not change across retries.
Do not trust the visible sender automatically
The From header can be forged.
Postwing reports the DKIM result and whether the signing domain aligns with the visible From domain. auth.dkim has five values:
| Value | Meaning |
|---|---|
pass |
A signature verified |
fail |
A signature did not verify |
none |
No signature at all—normal for plenty of legitimate mail |
temperror |
DNS did not answer, so nothing could be checked |
permerror |
The signature or its key is malformed |
temperror and permerror are kept separate from fail on purpose: “this message is forged” and “we could not check” are different facts, and a rule that drops everything except pass should account for both.
There is no spf field and no dmarc field in the payload, also by design. SPF is not evaluated in this path, and deriving a DMARC verdict from DKIM alone would produce false failures for SPF-aligned mail.
For workflows that require stronger sender confidence, treat a sender as authenticated only when:
event.auth.dkim === "pass" &&
event.auth.dkim_aligned === true
Even then, authorization remains your application’s responsibility. A correctly authenticated sender is not automatically allowed to modify every project, ticket, or account.
Authorize from the accepted recipient
Use the recipient and matched route to determine where the message belongs.
Do not treat every address in the message’s visible To or Cc headers as an address Postwing accepted. Header recipient lists can include unrelated or manipulated values.
Validate attachments
Before processing an attachment:
- Enforce an application-level size limit
- Allow only required file formats
- Check the real file signature, not only the MIME type
- Scan files for malware
- Generate new storage filenames
- Keep files outside the public web root
- Avoid rendering untrusted HTML directly
Postwing’s own limits are a maximum message size of 30 MB, up to 25 attachments, and a maximum individual attachment size of 25 MB. Your application may want stricter ones.
Prevent email loops
Be careful with automatic replies.
Do not configure an autoresponder that sends responses back to the same inbound route. Postwing bounds a runaway loop by counting Received: hops and by the per-domain hourly limit, but that is a backstop against growth, not a substitute for correct autoresponder logic.
Automated messages and mailing-list traffic are not discarded for you—that is your mail, and the decision is your application’s. Inspect headers such as Auto-Submitted, Precedence, In-Reply-To, and List-Id; they are included in the event.
Inbound email is not a mailbox
Postwing inbound email is intended to deliver mail to code.
It is not a replacement for Gmail, Outlook, or a shared support mailbox used directly by employees. There is no IMAP or POP3 interface, and users do not sign in to read or reply to messages.
Your application owns the user experience.
For example:
- A support SaaS displays inbound messages in a ticket timeline.
- A CRM displays them in a contact activity feed.
- An accounting product displays them beside an invoice.
- A project-management platform converts them into comments.
- A document platform displays them as processed uploads.
Replies can be sent separately through Postwing’s email API, SMTP relay, or SDK.
Why use an inbound email service instead of self-hosting?
Running your own inbound SMTP server gives you complete control, but it also gives you complete responsibility.
You must handle:
- SMTP listener availability
- MX and reverse-DNS configuration
- TLS certificates and protocol configuration
- MIME parsing edge cases
- Oversized messages
- Address validation
- Queue management
- Retries and temporary failures
- Spam and abuse controls
- Raw-message and attachment storage
- Security updates
- Monitoring and incident response
For an email infrastructure company, that investment may make sense.
For a SaaS team whose actual goal is to turn an email into a ticket, comment, invoice, lead, or uploaded document, it usually does not.
Postwing keeps SMTP at the edge and gives your application the interface developers already know how to operate: a signed JSON webhook over HTTPS.
Frequently asked questions
Can I receive email without opening port 25?
Yes. Your application does not need to open port 25 when an inbound provider accepts email on your behalf. You point your receiving hostname’s MX record to the provider and receive messages through HTTPS webhooks.
The provider still uses SMTP to communicate with sending mail servers, but that SMTP connection never reaches your application server.
Can I use port 587 instead of port 25 for inbound email?
Not for ordinary server-to-server internet delivery.
Port 587 is designed for authenticated message submission by clients and applications. Mail-server relay continues to use port 25.
What about port 465?
Port 465 is used for message submission over TLS. It is not a general replacement for an MX server listening for public email delivery.
Do I need to install Postfix or Exim?
No. Postwing accepts and parses the SMTP message. Your application receives an HTTPS request containing the parsed message data.
Can I receive attachments?
Yes. Inbound webhook events include attachment metadata—filename, MIME type, size, inline status, and content ID—plus authenticated API paths for retrieving each file. The raw .eml message is also available.
Defaults allow up to 25 attachments of up to 25 MB each, within a 30 MB message.
Can I create dynamic email addresses?
Yes. Prefix routes such as ticket-* can accept addresses including ticket-123@inbound.example.com. A catch-all * route can accept any address that does not match a more specific route.
What happens when my webhook is temporarily unavailable?
Postwing retries after 1 minute, 5 minutes, 30 minutes, 2 hours, 6 hours, and 24 hours. Because delivery is at least once, your application must deduplicate events using event_id.
The message itself is stored either way and stays available through the API and the dashboard.
Can I receive email on my main company domain?
Technically yes—the receiving hostname may be the verified domain itself. But if that domain already carries company mail, there is no reason to replace its MX records, and Postwing refuses the configuration when it finds another provider’s MX already published there.
The practical choice is a dedicated subdomain:
inbound.example.com
It leaves the MX records serving example.com untouched.
Which plans include inbound email?
Inbound email is part of the paid plans; a plan needs both webhooks and inbound routes enabled. It is not available on the free plan.
Receive email without operating SMTP infrastructure
Blocked SMTP ports do not have to block your product roadmap.
Instead of exposing port 25 and maintaining a mail server, let Postwing accept incoming email for a dedicated hostname. Your application receives each message as a parsed, signed HTTPS webhook that can be processed using your existing API infrastructure.
The result is a simpler architecture:
Configure MX
    → create a route
    → verify a webhook
    → process incoming email
Use inbound email to create support tickets, accept replies, ingest invoices, capture leads, process reports, or give every customer and application object its own email address.